How to set up joystick with UgCS
Setting up profile for vehicle control
UgCS supports most of the controllers. Pick one of your choices and connect it to the laptop.
If the controller is connected for the first time, wait for the system to detect it or install the drivers manually.
UgCS should detect the controller automatically.
Click the keyboard icon – the Input mapping to adjust the controller settings.
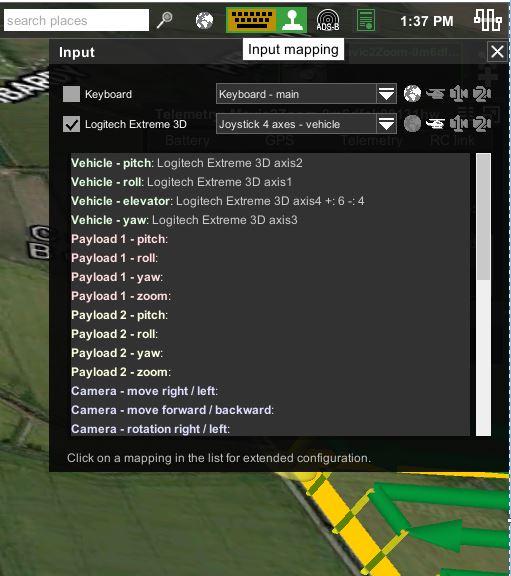
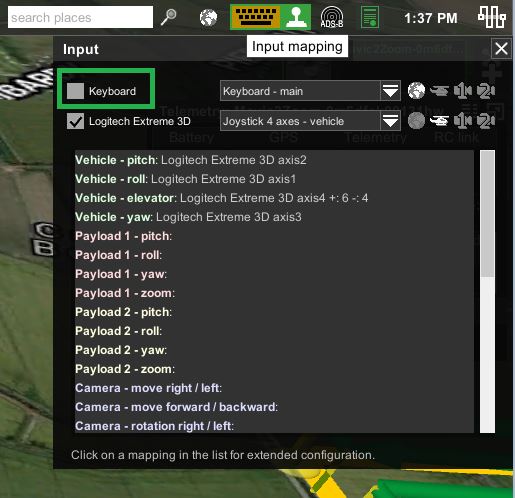
Uncheck the keyboard box for ease of navigation.
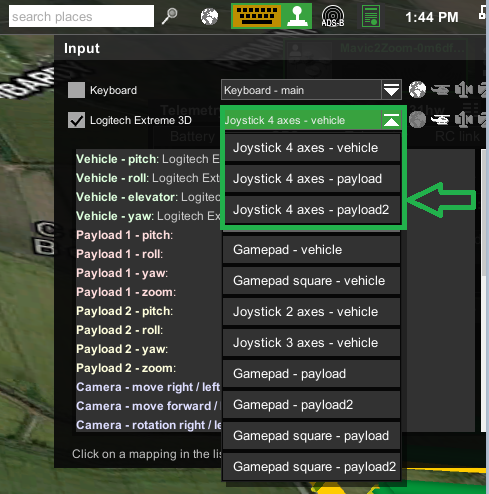
Select what the controller is mainly going to control - vehicle or payload.
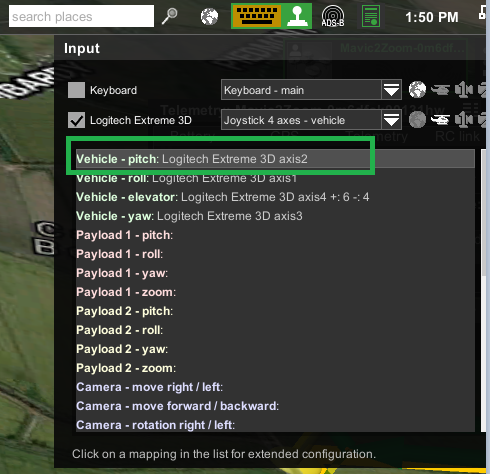
UgCS has assigned four axes out of six this particular controller has – pitch, roll, elevation, and yaw.
Two remaining axes can be assigned to different actions.
Example of pitch parameter control settings:
Click the vehicle pitch parameter.
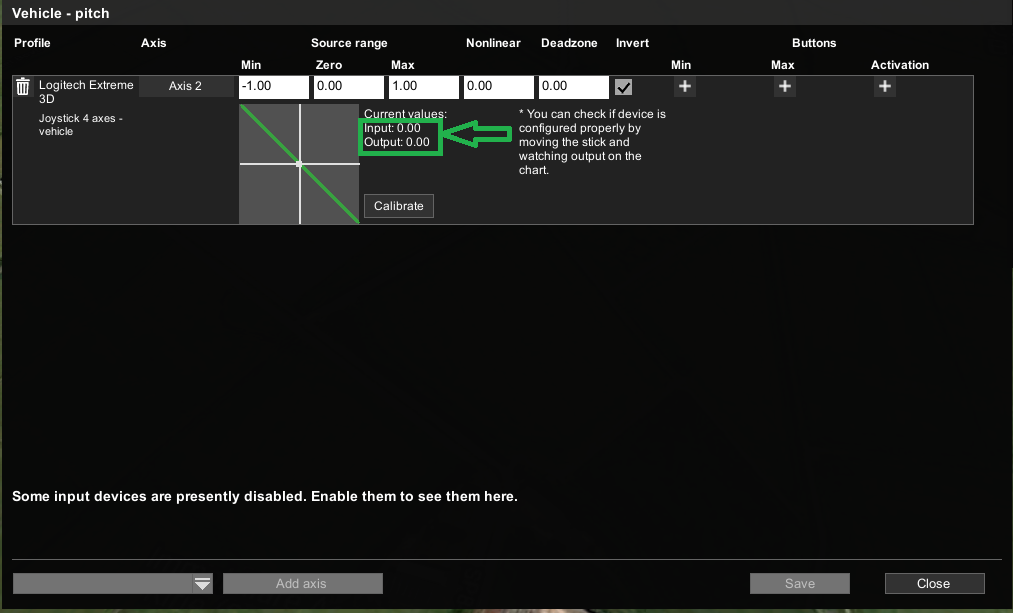
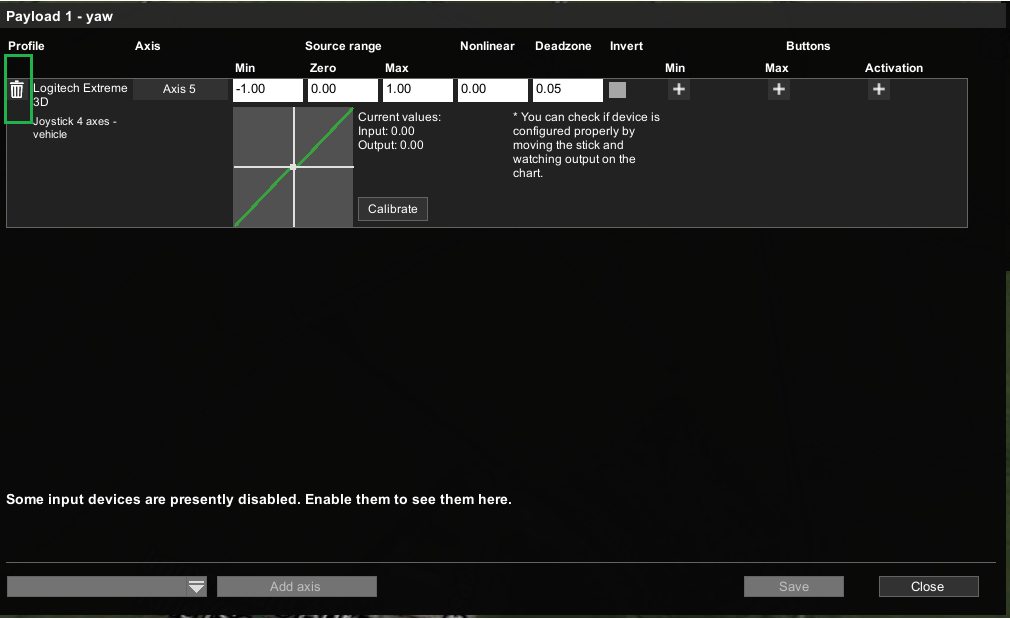
The two main parameters are Input and output.
Input represents how much force you apply to the joystick.
Output represents how this force will affect the throttle
Min, zero, and max parameters represent the throttle output. More the number – the less output you’ll receive.
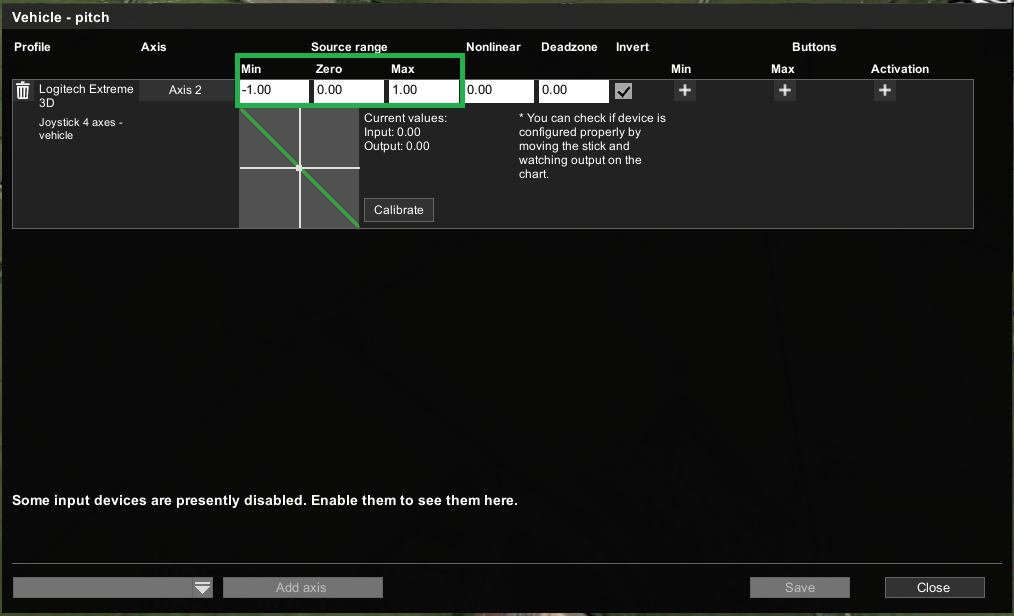
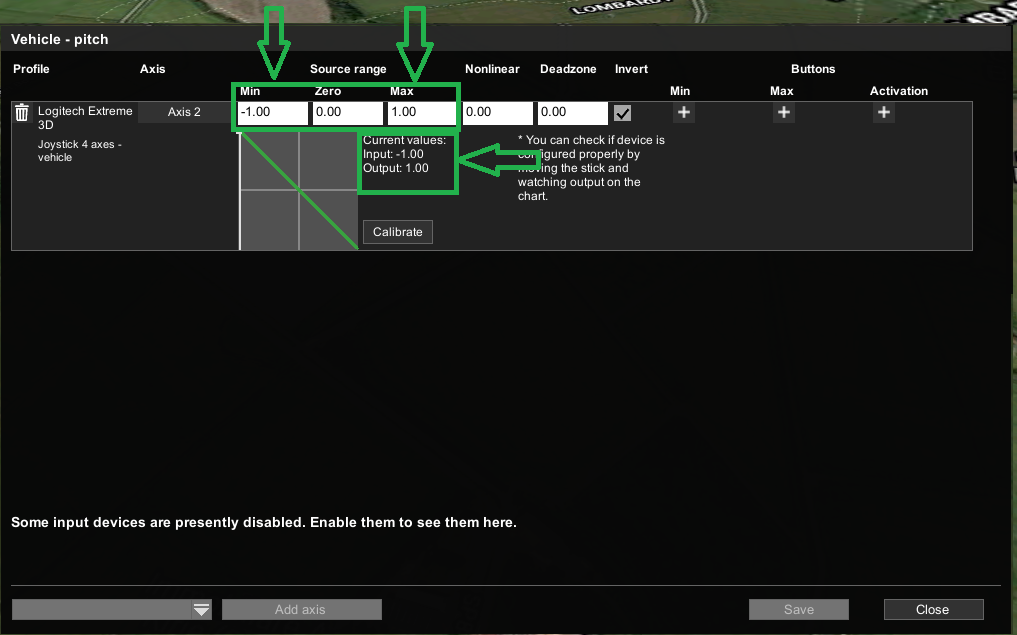
For instance: With Min and max parameters set to minus one and one correspondingly, the drone will fly at full throttle.
If these parameters are sent to minus three and three for instance. It will give only about 30 percent of the throttle.
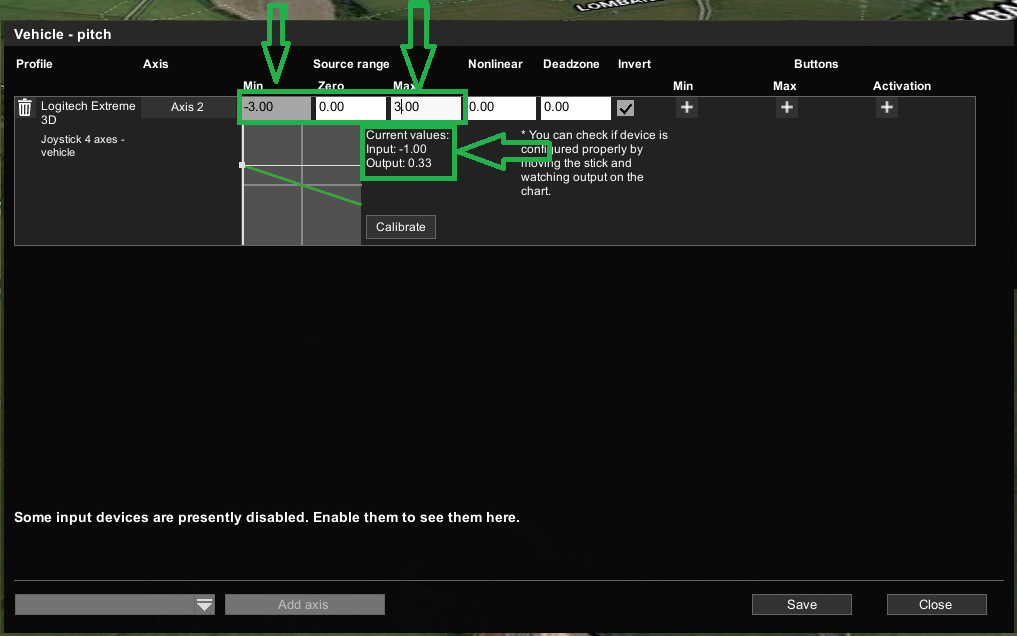
Note: Negative and positive parameters represent backward and forward thrust correspondingly. Zero represents the state of rest.
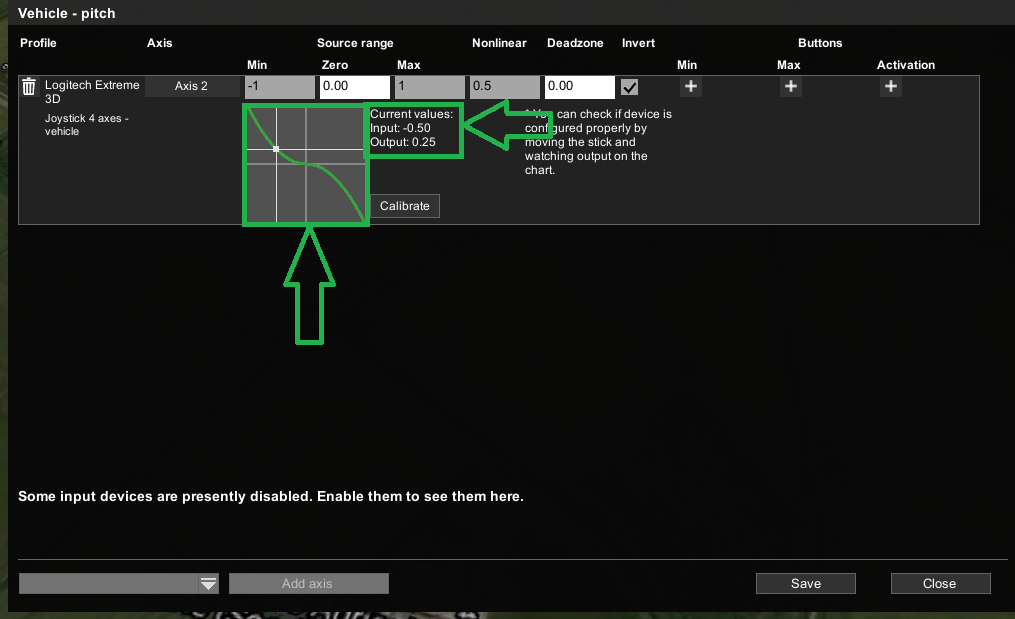
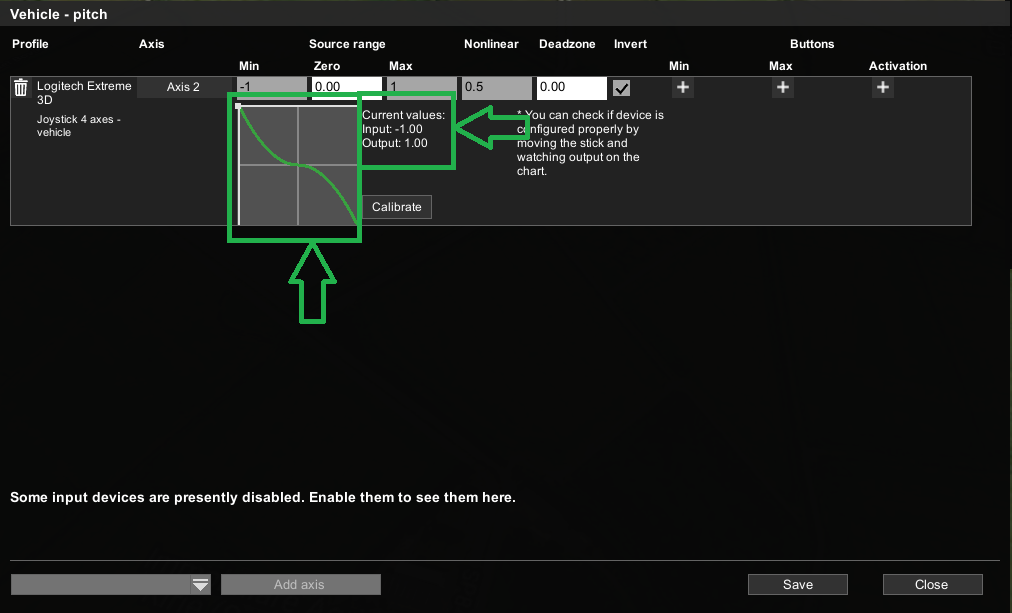
The nonlinear option allows changing throttle sensitivity. If it’s set to zero, the throttling will be linear. In other words – the more force applied to the controller – the faster the drone flies. If set to zero point five, for instance, the cubic parabola has changed, so the drone will accelerate much slower at the beginning and the more force being applied to the controller, the faster it will fly.
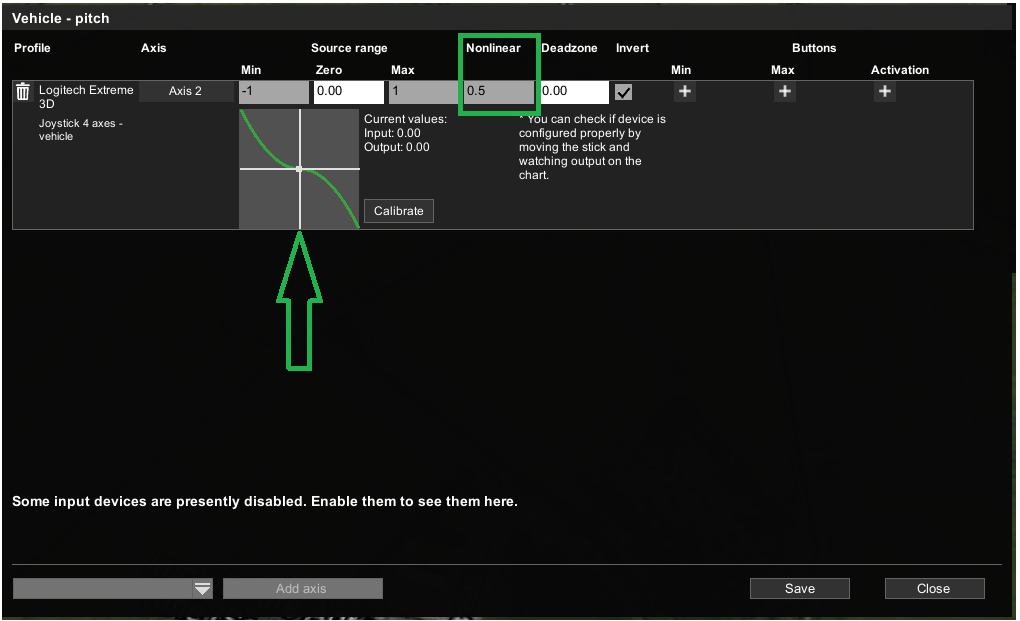
Example: Nonlinear is set to 0.5, the joystick is halfway pushed forward, displaying input parameter -0.50, resulting in an output throttle of 0.25
Example: Nonlinear is set to 0.5, the joystick is at the full forward position, displaying input parameter -1, resulting in an output throttle of 1 (Which is full throttle)
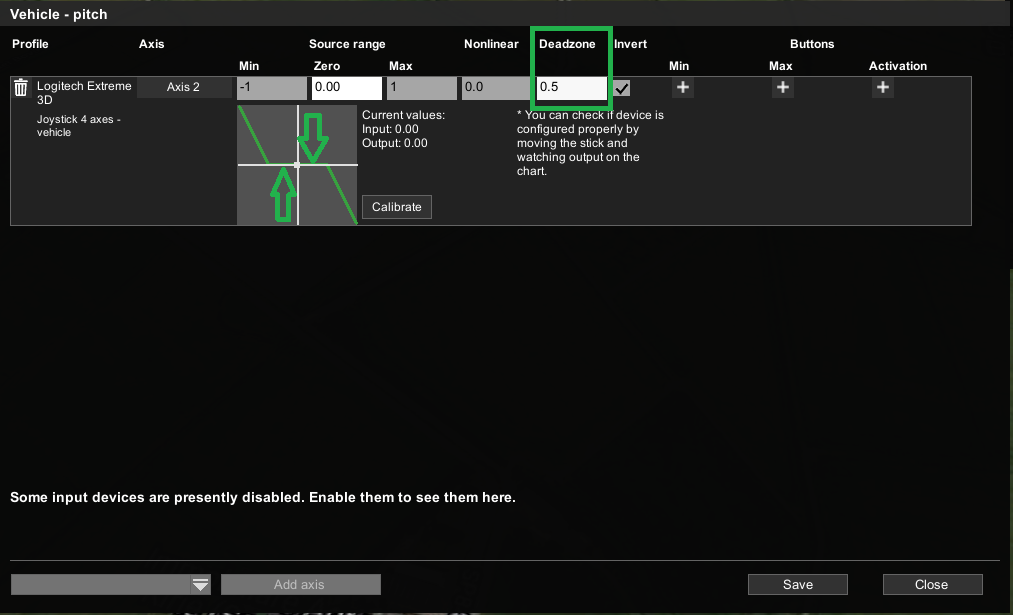
Deadzone ignores part of axis control. If it’s set to zero – the axis is used to control the vehicle all the way and set to zero point five, for instance. Only the last half of the axis is going to be used. Pushing the joystick halfway will not affect the drone.
The invert checkbox allows you to invert the control.
It's also possible to add action buttons to reach the minimum and maximum throttle with just one click. Click the little plus icon under the min or max sign.
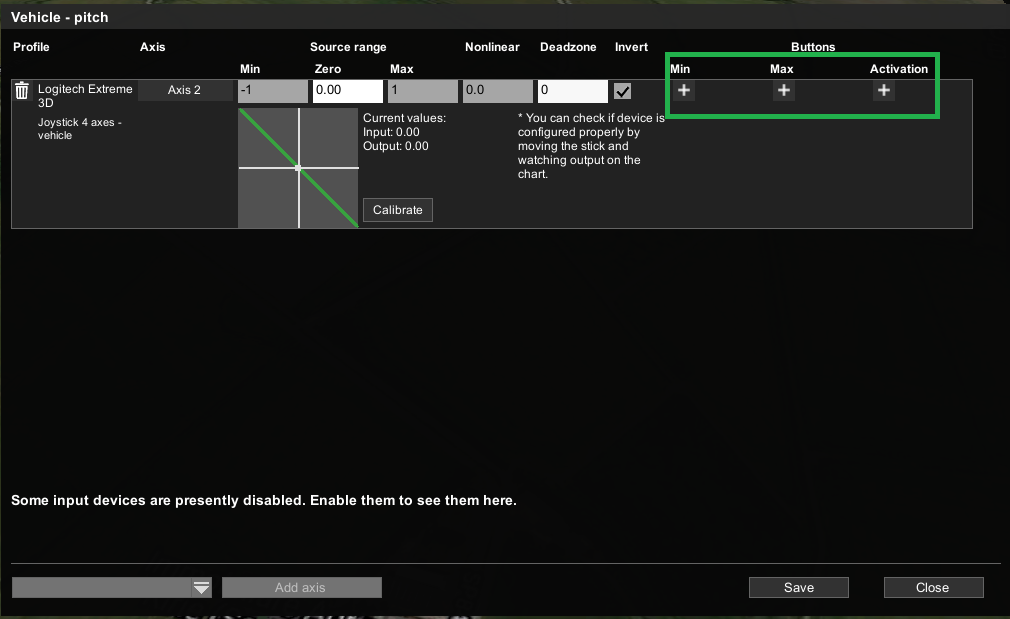
And click the desired button on the joystick, then click apply. Now by pressing the selected button, the drone will move at full throttle instantaneously.
The activation button is basically the button to activate the axis. Axis is active by default if no button is specified.
Calibrating these parameters creates the drone control profile.
Adding payload actions
Two unassigned axes, the joystick has on the top hat, can be used for payload control.
Select the payload action responsible for the camera or any other equipment on the drone.
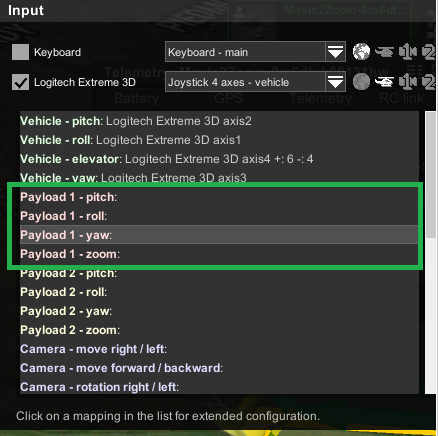
Note: scrolling the list will result in many other different possible actions.
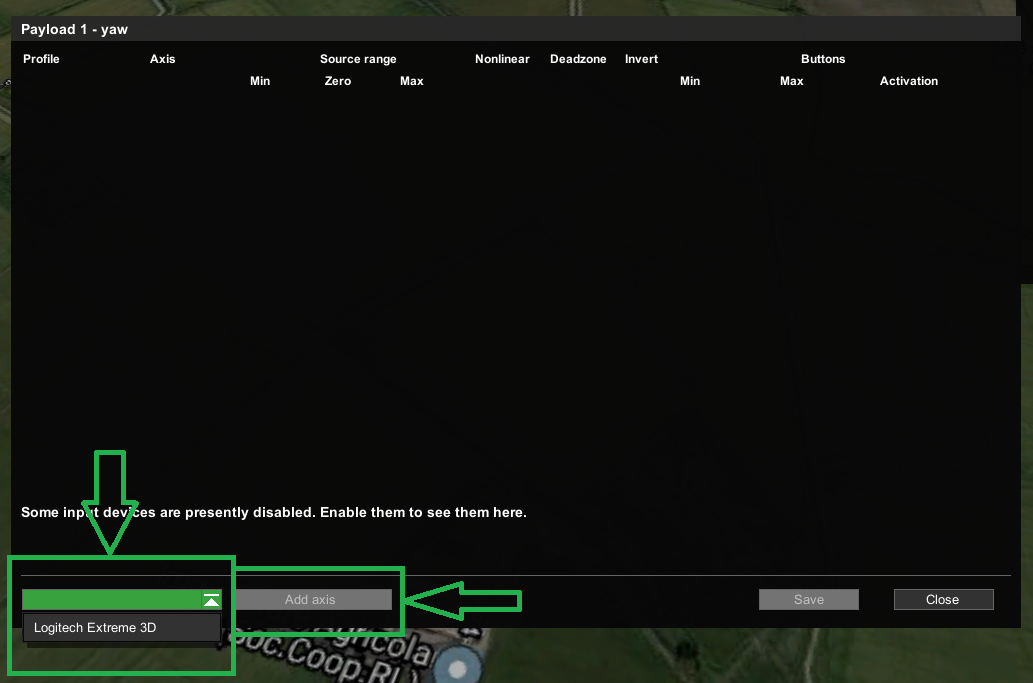
Select the connected controller by pressing drop-down window at the bottom left corner of the pop up window, then select "Add axis".
Press the joystick hat in the direction desired for payload control. UgCS will detect the axis and assign it to the payload action. Press Apply and save.
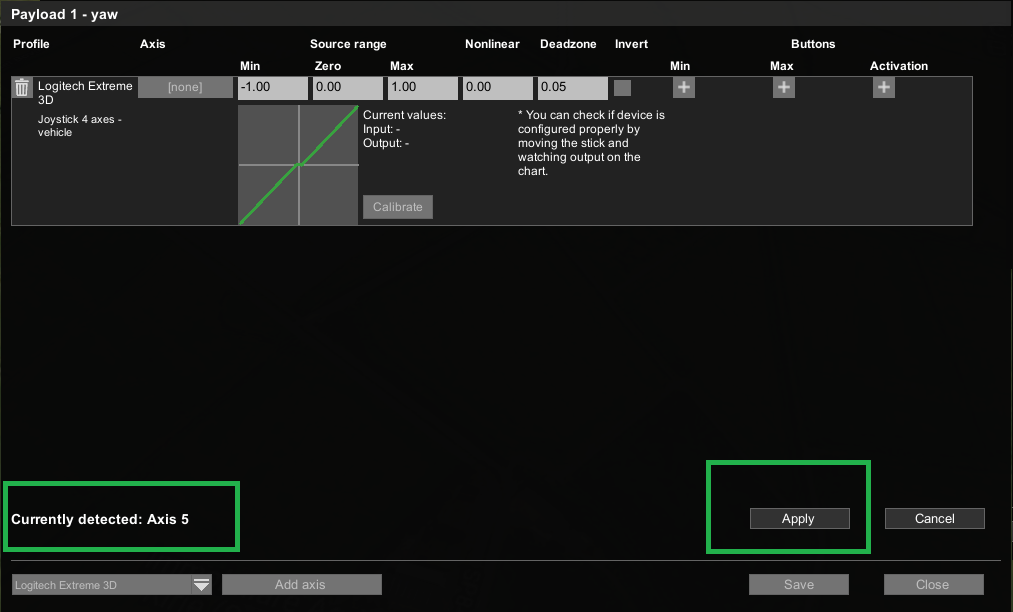
The one left axis can be assigned to any other actions.
Note: Make sure not to use the same axis for two completely different actions. Axis used can be seen in the input window.
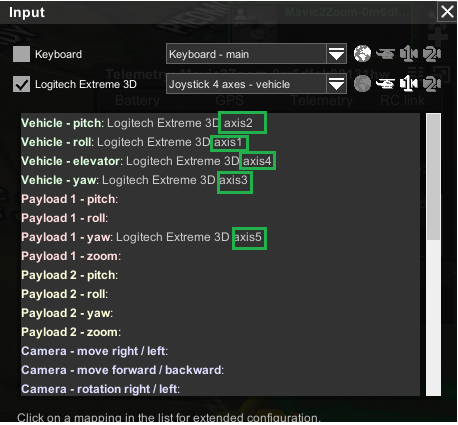
Axis can be remapped by selecting it and deleting the action by pressing the recycle bin button.
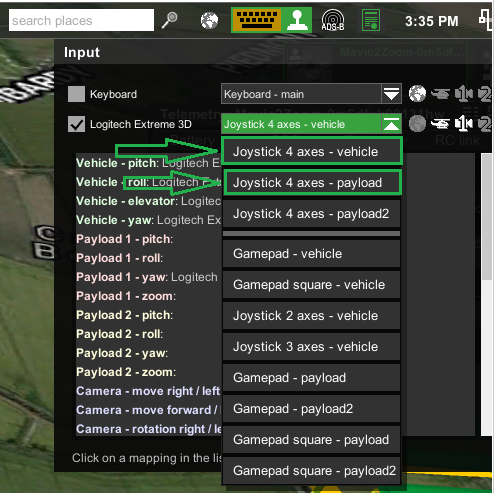
Important: Depending on the controller type and the available amount of axes, different amounts of actions can be assigned. In case there are not enough available axes to control the vehicle and the payload simultaneously the actions can be split in the mapping menu. Selecting them manually will result in either vehicle of payload control.
Updated 2 months ago
